Showing posts with label Cake. Show all posts

Monday, July 30, 2012

Polka Dot Swiss Rolls..a success and about time too!

I have never been one to be fancy of swiss rolls. I don't know why that is. These pillowy, eggy cake with all sorts of delicious fillings to me were rather...intimidating.


Okay, i lied. I KNOW exactly why I do not fancy them. Haha. Back when I just started my interest in baking - it was 2005, I tried baking many butter cakes, pound cakes and cupcakes. I tend to avoid recipes which calls for beating egg whites. I'm lousy at determining the soft peaks, stiff peaks and always have the tendency to overbeat the whites into a bubble of watery blah.

One fateful day, I thought to myself that I should bake a swiss roll. I was so excited and did no research whatsoever on how to make the sponge. I mean, cmon, cakes are cakes right? You beat 'em butter and eggs till fluffy, you beat in the sugar etc...

I did everything wrong and ended up with a slab of flat, hard and sticky cakescuit. You know, cake & biscuit...or biscake..whichever rocks your boat. heh. We (my hubby, Rah and I) could not define what it tasted like. The texture was...hmmm...non descript. Evenetually, it was a good snack for Mr Bin.


From then on, I AVOIDED making sponge cakes. However, the Hokkaido Chiffon cakes reawakened my senses and i tried baking sponge cakes of late. and Ooohh..oohhh..ooohhh....i discovered sooo many things which I have done wrong in my first attempt at the sponge!  I found the nearest wall and knocked my head against it. Good job Yan, it took you 7 freaking years to learn this. Such a YouTube idiot! There are so many tips on baking sponge on YouTube and I didnt even bother.

Last Friday, I was at Sun Lik with my buddy to buy baking stuffs and saw a Japanese book which had so many pretty decorated swiss rolls on it. You can see what I mean from here. Seen it yet?? Pretty, cute, kawaii.....no!? I told myself, its time to try making a swiss roll and since I have missed all that 7 years, I should make something more challenging than a normal one. Okay....its not THAT challenging since the design I chose was just simple polka dots. But it was an effort all the same and the result was beautiful!

I ran out of whipped cream for the filling so I used Nutella as the filling and loaded it in with Kit Kats. It was a hit with the kids and I brought it to a gathering with friends and it was very well received - even got an order for it.

Decorated Swiss Rolls (basic swiss roll recipe adapted from Honey Bee Sweets):

Vanilla Swiss Roll:

Egg Yolk Batter:
4 yolks
40g caster sugar
75ml water
50ml vegetable oil (I used Canola oil)
1.5tsp vanilla essence (I used 2tsp)
100g cake flour 
Egg Whites Batter:
5 egg whites
40g caster sugar
1/4 tsp cream of tartar
Okay, this is as far as I followed the recipe because I found the instructions on mixing the different batter colours rather confusing. I feared that I may misunderstood her instructions so I trawled the internet and read somewhere (sorry, I forgot where it was from) that I could simply add 30g of cake batter to 2tbsp of Egg white batter and colour it as I wish. ..and Yay! it worked!


  1. Sift cake flour, set aside. Line a 10" x 14" Swiss roll tray with parchment paper. Grease underneath the paper to ensure it sticks real well to the tray. Lightly grease, verrrryyy lightly, on the surface of the paper. Pre-heat oven to 150 degC.
  2. With an electric mixer, whisk egg yolks and sugar on high for about 5 mins. You will see that the batter will turn fluffy, doubled in volume and abit pale. Add the water, oil and vanilla to mix.
  3. Add sifted cake flour into the batter in about 3 portions. Fold in the flour into the batter taking care not to mix to hard as it will deflate the batter.
  4. SEPERATELY, in another bowl, beat the egg whites and as you see bubbles, add the cream of tartar and the sugar a little at a time.
Now, time to make the decorated portion of the recipe.

  1. Take 30g of the egg yolk batter and mix in 2 tbsps of the egg white batter.
  2. Seperate the mixture into different bowls and tint the mixture in the colours you want.
  3. Put the coloured batter into piping bags and pipe on the parchment with the designs you want.
  4. When you're done designing, bake the design in the oven for about 1minute.
  5. DO NOT BAKE TOO LONG. You just want to bake short enough so that the batter will set and will not run into the main cake batter when its poured over the designs.
  6. Set aside to cool. Increase the oven heat to 175C.
We're now back to the main cake mix.

  1. Gently fold in 1/3 of the egg white batter into the yolk batter. Mix well.
  2. Pour the mixed batter into the remaining 2/3 of the white batter and mix well.
  3. Pour the cake mix over the design on the cake tray and smooth the batter evenly.Bake for 10minutes.
  4. Cool the baked cake and turn over on a parchment paper. You will see the design on the sponge portion of the cake that way. Peel away the parchment carefully. Some of my dots got stucked on the parchment but it was too few to bother.
  5. Use another parchment paper to turn over the cake so that you have the skin facing you.
  6. You have an option to peel the skin or leave it be. I guess I would leave the skin on if it was whipped cream filling as it would be easier to spread.  But since the filling is nutella and its a bit sticky, I chose to peel away the skin.
  7. Fill the cake with nutella and Kit Kats and then Roll away! I wrapped the rolled cake with the same parchment I rolled it with and placed it in the fridge.
  8. I enjoyed the cake a few hours later.

So this cake here, ended my misery with sponge rolls. And I can betcha Im making more of these. In fact, I am planning to make one in a totally different recipe and method altogether. Its already bookmarked and I just need to find TIME to do it. Happy decorating and rolling!

Yan 

Sunday, July 29, 2012

Honey, I shrunked the Hokkaido Rose Chiffon Cupcakes

Hiya Peeps!

 Its been ages since I last blogged!! This is quite embarassing. Nampak sangat tak consistent kan? heheh. My excuse is the same one - time did not permit as I was studying and managing my household and a now semi-defunct baking business. Why semi-defunct? Cos  after 2 yrs terperok pat rumah studying, I am working full-time and don't know if I could commit to orders in my hectic schedule. As such, i choose my orders carefully and exclusively.


Of late, I started to get my urge to bake again. So I baked for leisure and posted pics on my facebook. My colleagues, sister and friends said I should start a baking blog. Hahahah....little did they know that I DID start one...err...maybe two...but I can't manage my time well enough to update it often! So, in short, none of my friends know I even have this blog!

Pure Nonsense, I tell you!

Lately, I've been inspired by the many baking blogs on the internet. I felt challenged to do many of the recipes. I kept telling myself "why am I not baking?"  "Oh these looks good! How do they taste, I wonder" "these look so diffy to make! Should I try? Why am i not trying?" "alamak, bole ke buat kek ni? Ngeri Ummi lah"....

Anyway, one of my favourite bakers, Kak Rima inspired me to try out making chiffons. Her Hokkaido Chiffon Cupcakes were calling out to me. I have also bookmarked Evan's Rose Chiffon for the longest time - fell in love with the pictures she posted. So I decided to combine the two in this chiffon cupcake I made. I guess you can't really call this Hokkaido Chiffon as I did not fill mine with cream but the base recipe was a Hokkaido Chiffon recipe and I tweaked it abit to add rose essence and abit of pink colouring. (How to put in cream? Da senget benget, cream pon tak muat!)


 Initially, the cakes rose beautifully and it had a dome which rose slightly above the cupcake liner. I could not turn it over to stop it from shrinking. So you guessed it, all the cupcakes started to shrink and shrivel away from the cupcake liners. They pruned up horrendously and I just had to remove them from the liners! Kemek, bengot and so buruk! huhuhu... Is it really because I did not turn them over or is there some other tips I should know to prevent this from happening? Do share~!

Hokkaido Rose Chiffon cupcakes (base recipe from BisousAtoi)

Ingredients:
2 cups cake flour before sifting
1 cup sugar*(i reduced this to 3/4 cups)
1 tbsp baking powder
1/2 tsp salt
1 cup milk
1/2 cup vegetable oil
1/2 tsp vanilla extract (I used vanilla essence due to extract's alcohol content)
5 egg yolks
8 egg whites
1/2 tsp cream of tartar (or 1/2 teaspoon lemon juice or white vinegar)

(i added 3tsps of rose essence)

Whipped Cream Filling: (i did not make this)
2 cups whipping cream
1/4 cup sugar
1/2 teaspoon vanilla extract


Method
1. Make sure everything is at room temperature, especially eggs and milk. Preheat the oven to 450 F.
2. Sift the cake flour together with baking powder and salt into a large mixing bowl.
3. In a medium bowl, blend milk, oil, vanilla essence and the 5 egg yolks.
4. Add the egg yolk mixture to the dry ingredients, and beat it for about two minutes.
5. Beat the egg whites with cream of tartar on high speed until foamy, then slowly add in sugar and continue to beat until stiff peak form.
 (Mindy (Rima's source) says: "Most recipes tell you to add most of the sugar to egg yolks, and only add a small amount to the egg whites, but some bloggers say that professional bakers do just the opposite.)
I tried this out but as I am an amateur in this chiffon business, I can't tell the difference. Wahaha! But I trust Rima's expert advise and she said it works very well- so there!"
6. Fold the meringue into the yolk mixture in 3 parts.
7. Spoon into 24 cupcake cups evenly, give them a couple of big taps on the table to break the large air bubbles in the batter for finer texture of the cakes, and bake at 175C for about 20 minutes. Tooth pick test for doneness. Remove from the oven, and cool on racks straight up.
8. Measure the heavy cream, sugar and vanilla into the mixing bowl, mix on high speed until medium peak form.
9. Fit the piping bag with a narrow tip, and fill it with whipped cream. Pipe the cream into center of the cupcakes after they are completely cooled or refrigerated. Dust with powdered sugar.

 
 Okay, thats all for now - I have a Durian Cotton Cake baking in the oven and there's tons of cleaning up to do. Groannnnn.....!

Thursday, July 2, 2009

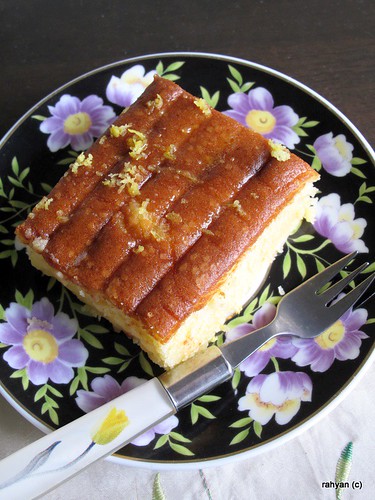
Supermoist Sour Cream Lemon Cake

I mentioned here before that I have more lemons in the fridge and would like to make something out of it. I was pretty excited as I had borrowed Baked: New Frontiers in Baking by Matt Lewis & Renato Poliafito and the sight of their oh so beautiful Lemon Lemon Loaf on page 41 got me hooked. However, the recipe calls for 8 large eggs and I thought "wow! that's a lot of eggs for 2 loaves of cake!" thus I decided not to use this recipe. I usually do not mind using so much eggs but the recent baking I did used quite a lot of eggs and I really should watch the cholesterol levels in this household. I want to give my family pleasure and tickle their tastebuds without compromising their health either. As it is, most of my bakes are discounted on their sugar if at all possible.

Anyway since I could'nt get the thought of fragrant, tangy and moist lemon cakes out of my head, I decided to scour the ever reliable internet for a similar recipe which use lesser eggs and I found this gem. Yippee it uses only 3 eggs and that's very acceptable to me and the end result was a smooth and moist cake which was reminiscent of a cheesecake, only with crumbs. Even my younger sister who is a cake-hater and a cheesecake-lover said she liked it. So this recipe is definitely a keeper!

Sour Cream Lemon Cake (adapted from Southernfood.about.com)

Ingredients:
2 cups all-purpose flour
2 teaspoons baking powder
1 teaspoon salt
1 cup butter, room temperature
2 cups granulated sugar
3 eggs
grated zest of 1 large lemon
1 cup sour cream

Lemon Glaze:

(Mine didnt turn out white and pretty cos I was scared of using so much sugar. So it became a clear syrup instead)
1/4 cup melted butter
2 tablespoons fresh lemon juice
2 cups sifted confectioners' sugar


Preparation:

Preheat oven to 325°. Generously butter and flour a 10-inch bundt pan.
Into a bowl, sift together the flour, baking powder and salt; set aside.
In a mixing bowl with hand-held electric mixer, cream 1 cup butter and granulated sugar; beat at high speed until mixture is very light and fluffy, about 5 minutes. Beat in eggs, one at a time, beating well after each addition and scraping down side of bowl frequently. Blend in lemon zest.

Add flour mixture to the creamed mixture alternately with sour cream, adding each in 3 additions. Scrape sides of bowl frequently. Pour batter into prepared cake pan; bake in the preheated oven for 55 to 65 minutes, or until a cake tester or wooden pick inserted near the center of cake comes out clean. Cool in pan 10 minutes.

Meanwhile, combine lemon glaze ingredients in a bowl, blending until smooth. Carefully turn cake out onto a platter; drizzle evenly with glaze.Serves 12 or more, depending on size of servings.